1. Make sure the custom report category you want your created custom report to appear under is highlighted (i.e., Private Queries, Shared Queries).
2. To start a new custom report, choose one of the following options:
· Click Add on the Ribbon.
· Right-click in the listing pane, and select Add from the drop-down menu that appears.
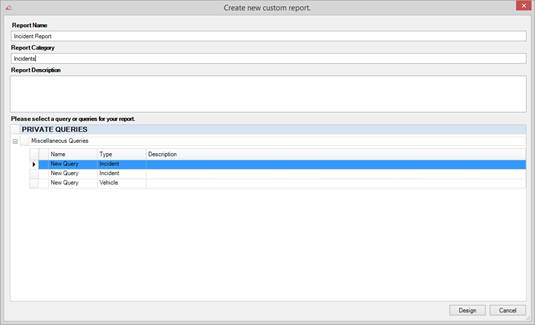
3. A Create New Custom Report dialog box will open.
4. Enter a title for the custom report in the ReportName field.
Note: Use specific names for your custom reports, because if same-named reports are shared, the user will only see the first query with that name.
5. Make sure the Report Category is correct. If you want to create a new Category, type it in this field.
6. In the Report Description text box, identify the type of custom report and/or its purpose.
Note: The Report Description field can be left blank. The Report Name and Report Category fields must be filled in.
7. Click Design.
8. The new custom report entry will be added to the relevant record entry node. The Perspective Report Designer window will open (refer to the Report Designer section for details on how to use the Report Designer).