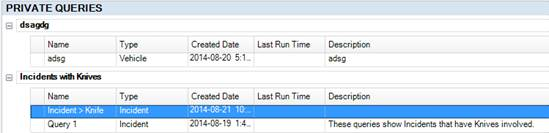
1. Make sure the query you want to share is highlighted.
2. To share the query, choose one of the following options:
· Click Share  on the Ribbon.
· Right-click in the listing pane, and select Share from the drop-down menu that appears.
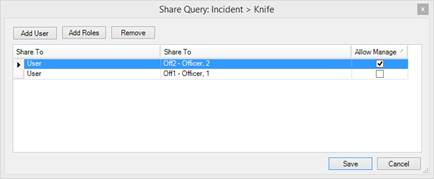
3. The Share Query dialog box will open.
4. Click the Add User button and/or Add Role button.
5. Select the user(s) and/or role(s) you want to share the query to by typing his/her name and/or role in the text field, or scrolling through all users and/or roles.
6. Double-click the user’s name and/or role to confirm your selection.
· Click the Allow Manage checkbox if you want the user or users in a particular role to have the ability to edit, share, delete, or clone the shared query.
· If you share to a user and a role, and that user is in the role as well, the query will be shared to him/her twice.
Note: If you give a user Manage rights when sharing a query, the user is able to modify the original query. To keep a copy of the original query that cannot be edited, clone it for yourself.
7. Click the Add Roles button.
8. Select the role you want to share the query with by typing its name in the text field, or scrolling through all roles.
9. Double-click the role’s name to confirm your selection.
· Click the Allow Manage checkbox if you want those with that role to have the ability to edit, share, delete, or clone the shared query.
10. Click Save.
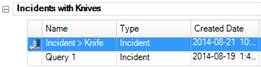
· Shared queries will have the  Share icon displayed beside the title.