Define Multiple Line Layouts
You can define different layouts for each type of line. Depending on the appearance conditions, the appropriate layout is used in each case according to the situation. For example, you can output two table lines for each data record in this way:
Proceed as follows to create table lines in the object dialog.
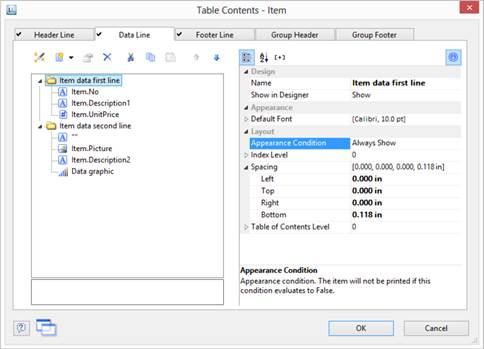
1. First select the line type that you want to edit by clicking the relevant tab, e.g., Data Line.
2. Now choose Insert Table Line in the context menu. Alternatively, you can select an existing Line definition and then click the New (Append line definition) button.
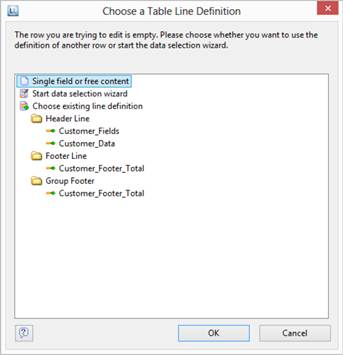
3. In the Choose a Table Line Definition dialog that follows, you have the option of:
· using an already existing layout as a template for the new line definition (very useful if the layout is similar).
· starting the data selection wizard (very useful if you want to create several columns in one operation)
· or creating an empty line definition so that you can then add the columns by means of the object dialog.
4. You have now created the new line. Edit the columns as described in Defining Column Contents. Change the order of the line with the arrow button or with Drag & Drop.
5. You can then specify the appearance of the new line as a whole. Various properties are available for this including:
· Appearance Condition with which you can specify when the line is to be printed. This is useful if you define multiple line layouts that are to be printed depending on certain values. The familiar dialog for defining logical expressions opens up here.
Appearance condition: not Lastpage()
Appearance condition: Grand total only on last page
· Name of the line e.g., data first line. This makes it easier to find the line in complex layouts.
· Display in Designer: with this property, you can hide the lines in the workspace – this is very useful if you have a lot of line definitions.
· Spacing (margins): here you define the top, bottom, right and left spacing of the line. The top or bottom values cause a corresponding space between the individual table rows. With the left and right spacing values, you can specify the margin in relation to the table object, i.e., you can indent lines or columns.
· The Default Font property sets the font for the entire table row. Newly inserted columns appear initially in this font.
· Outline Level (index level) of the bookmark in preview mode or for PDF export.